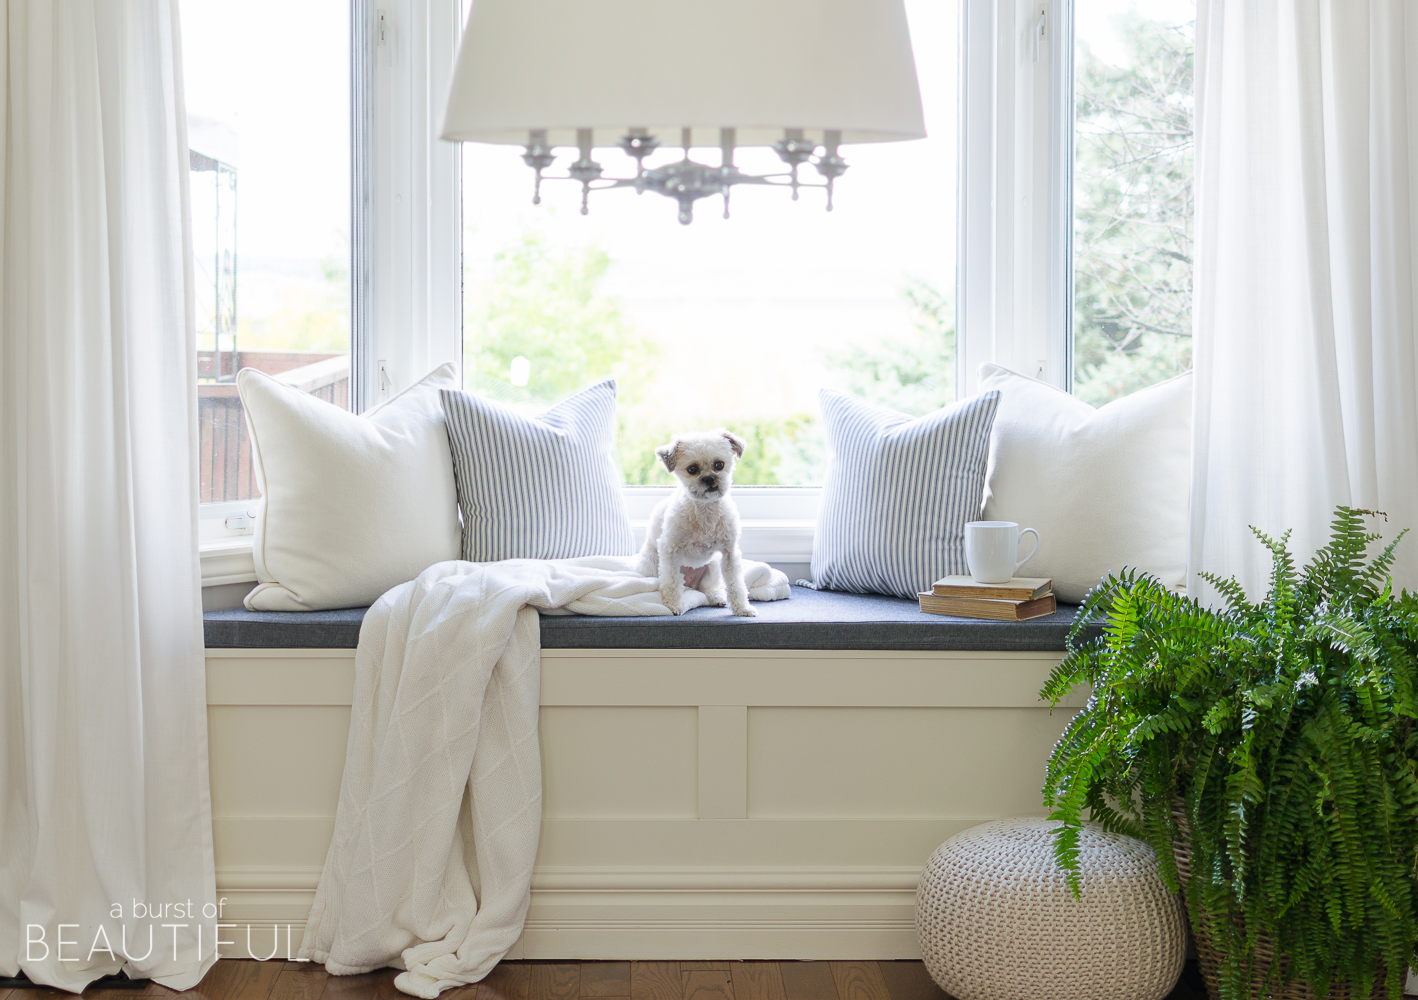
This little window bench is probably one of our favorite projects we’ve completed in our house so far. I think back to when it was just useless, empty space and I can’t believe we waited this long to utilize it. It truly was the perfect spot to add a window bench and it adds such character and charm (not to mention extra storage space) to our dining room. It’s the best spot in the house to curl up with a good book and watch the world go by. And we’ll show you how to build a window bench with storage in your own bay window below.
Alicia has always dreamed of having a window bench in our home where she and Zoe can curl up and read stories. Somewhere out of the way, where Zoe’s imagination can run wild as the natural light bounces off the pages of her favorite books. How could I not oblige and turn our bay window into a cozy nook for the two of them?
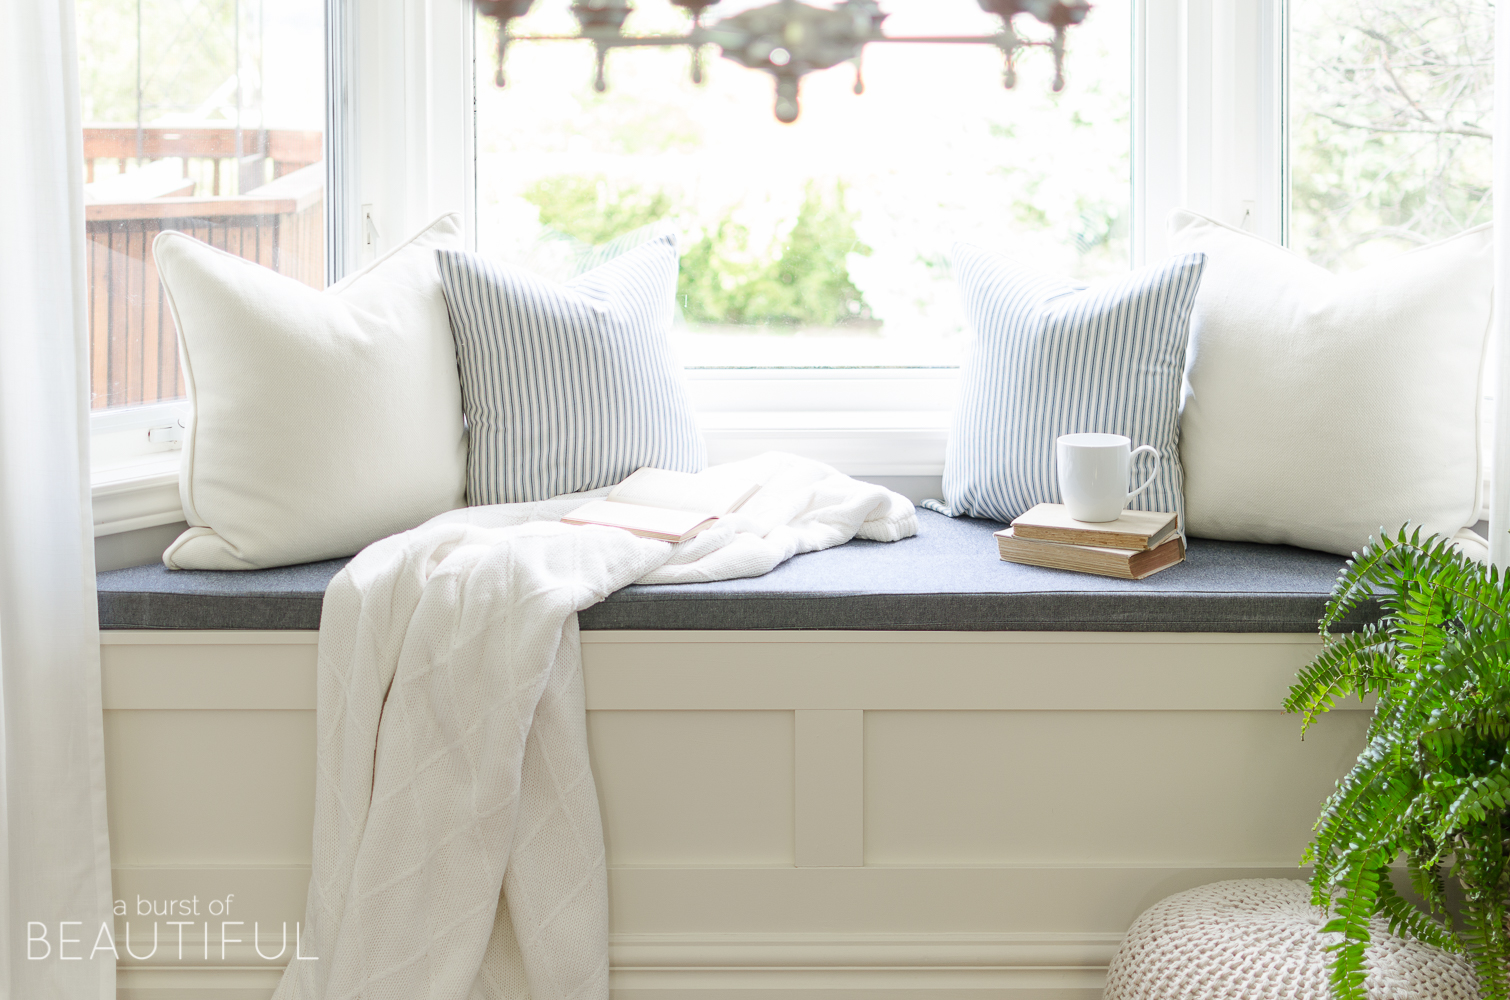
I don’t spend much time with my nose in a book, but it’s not because I don’t like a well-written story. I just can’t seem to stay awake long enough to get through a full chapter. Maybe it’s because I only have time to read before bed. But let’s face it, we have a house, a toddler, and three pets to take care of so that’s usually the only time we have to read.
On the other hand, Alicia loves reading. She can go through a book each week (whereas I would take about six months). Zoe loves to read books and has a few favorites, such as Where the Wild Things Are and I Love You Stinky Face.

Our window overlooks the bay and faces West so we have gorgeous sunsets that saturate the room at the end of each day. It is definitely God’s hand that creates the art on that wall. Other than that, it is a pretty ordinary bay window, with not much else going for it. That’s when we decided to make it a focal point and useful space in the room.
As I do with most of our projects, I sat down to sketch out a plan. I usually have a clear vision in my head when I start a project, but I always need to sell it to Alicia who likes to see an image before I turn something into reality. It also helps me figure out what materials I need and try to avoid any oversights that could happen due to poor planning.

Our friends at The Home Depot loved the concept and wanted to work with us on this design. It’s a weekend project that anyone with intermediate experience and the right tools can tackle.
There are two ways you can build this bench: the easy way, or the harder way. Aren’t those always the options to choose from? Why can’t it always be the easy way? I digress. The easy option is to build a sturdy frame and then cut a piece of plywood to size, add trim, fill holes, paint and you’re done. Easy, right?

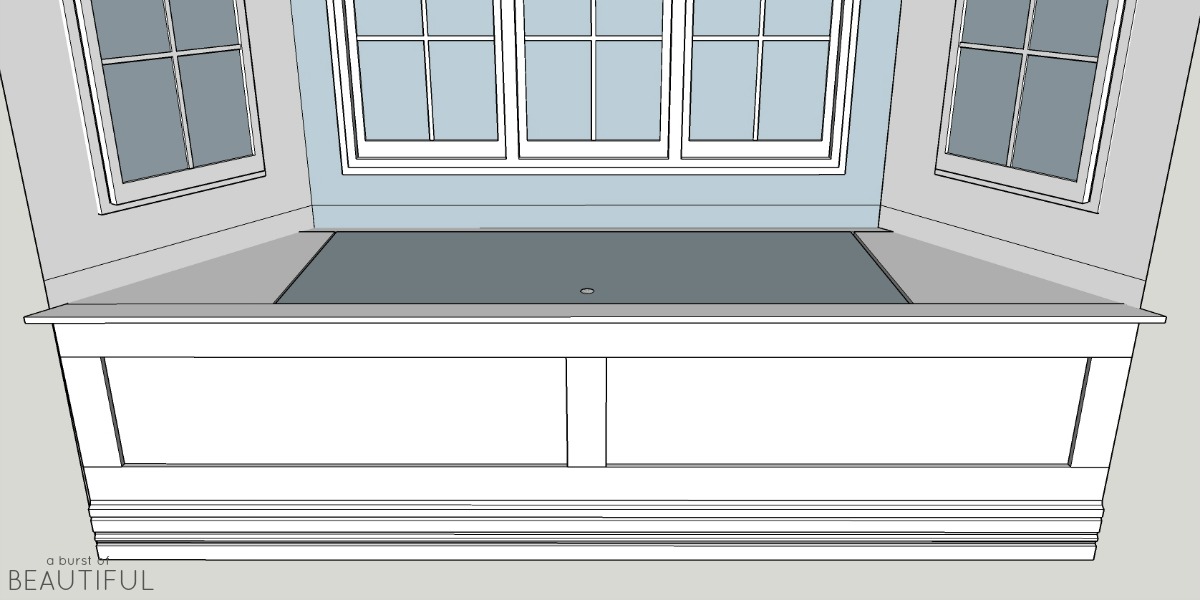
The harder option is to build a bench with storage. Now, if your bay window is square instead of angled, you’ll have a much easier time. Ours is angled and if I had made the top one large piece, it wouldn’t have lifted up due to the angles of the window. So I had to come up with a design where only the center portion of the bench opened up. I also wanted the lid to be hidden so that it would look seamless from the front once a cushion was placed on top, and it would also keep our little one from being able to open it. This required a little more thought and proper design planning.
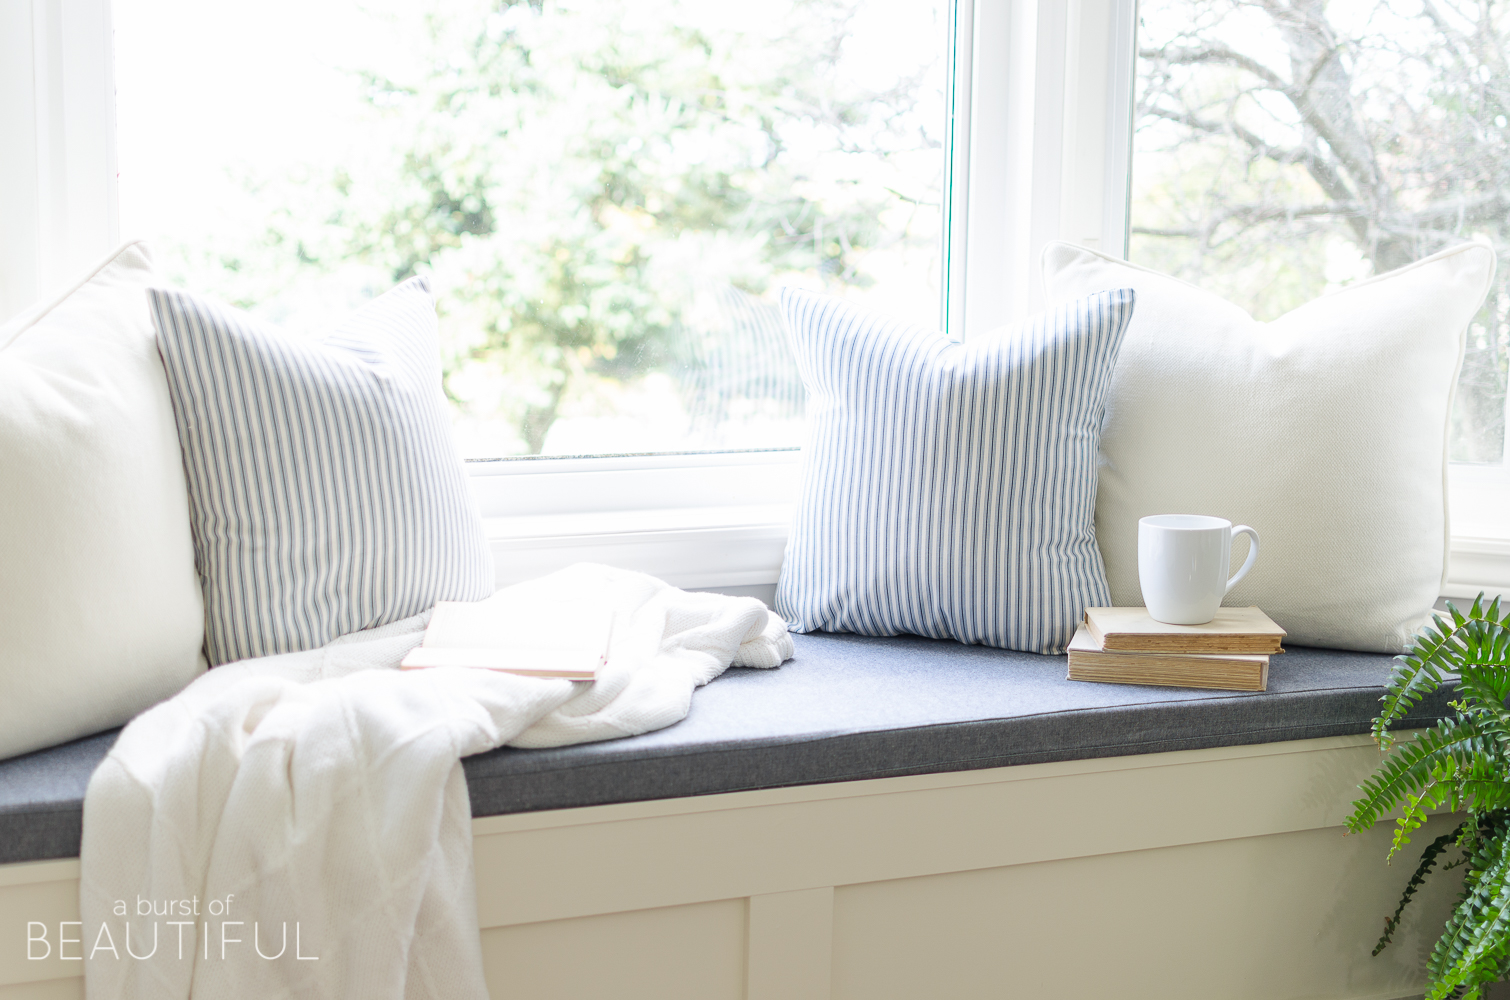
I had considered creating a shelf-like base inside the bench so that when it was open, it would look completely finished. However, I realized that this would reduce the amount of storage space inside the bench. This won’t be something we need to access every day so it doesn’t need to look ‘pretty’.
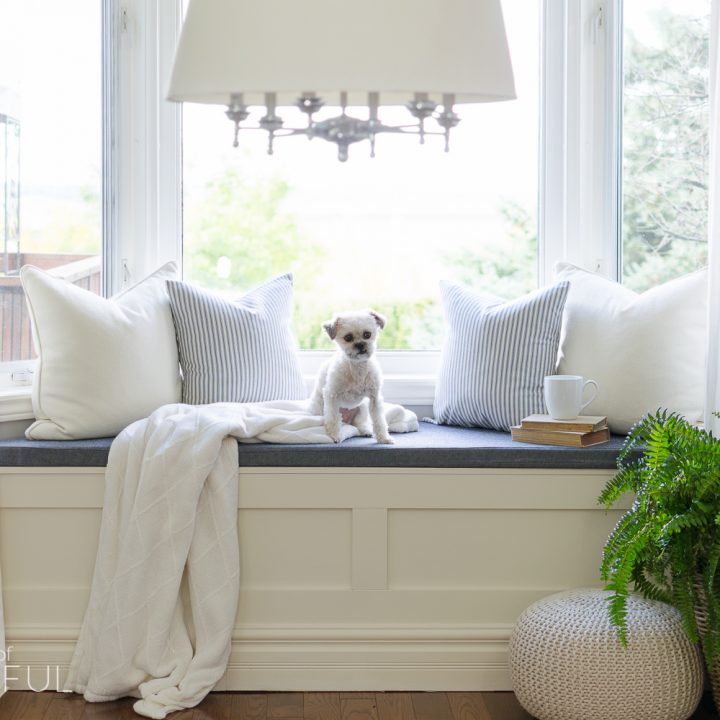
How to Build a Window Bench with Storage
The steps below and any measurements mentioned are guidelines since each window will be different in size and shape. We are providing this as a tutorial to help you build your own window bench. This project requires intermediate carpentry skills.
The number of products required will be dictated by the size of your window. So my suggestion is to draw out your plan and calculate how many of each of these products you will require.
Materials
- 2″ x 4″ x 8′ SPF Dimensional Lumber (for framing)
- 1″ x 4″ x 8′ MDF (for the front edge, back edge and panel trim)
- 1/4″x 2′ x 4′ Birch Plywood Handy Panel (we used two for front panels)
- MDF Bullnosed White Shelving 5/8 Inch x 15-1/4 Inch x 96 Inch (for the top)
- 24 Inch x 1 1/4″ Nickel Continuous Hinge (Piano Hinge)
- Primed Finger-Jointed Pine Cove Trim (for the last step, #19, if required)
- 2 1/2″ Kreg Pocket Hole Screws
- 2 1/2″ wood screws
- 2 1/2″ construction screws
- Wood glue
- Wood filler
- 1.25″ Brad Nails
- White Caulking
Tools
- Kreg Jig
- Mitre saw
- Circular saw
- Cordless Drill
- Brad Nailer
- Caulking Gun
Instructions
- First and foremost, wear proper personal safety equipment when using any power tools.
- Remove any baseboard from the bay window.
- Determine the height of your bench. If you are adding a cushion you’ll want to reduce the frame height by 2″ plus the height of your seat board. We settled on a finished height of 20″ including the cushion. Therefore, the math to figure out the height of the frame is 20″ – 5/8″ – 2″ = 17 3/8″.
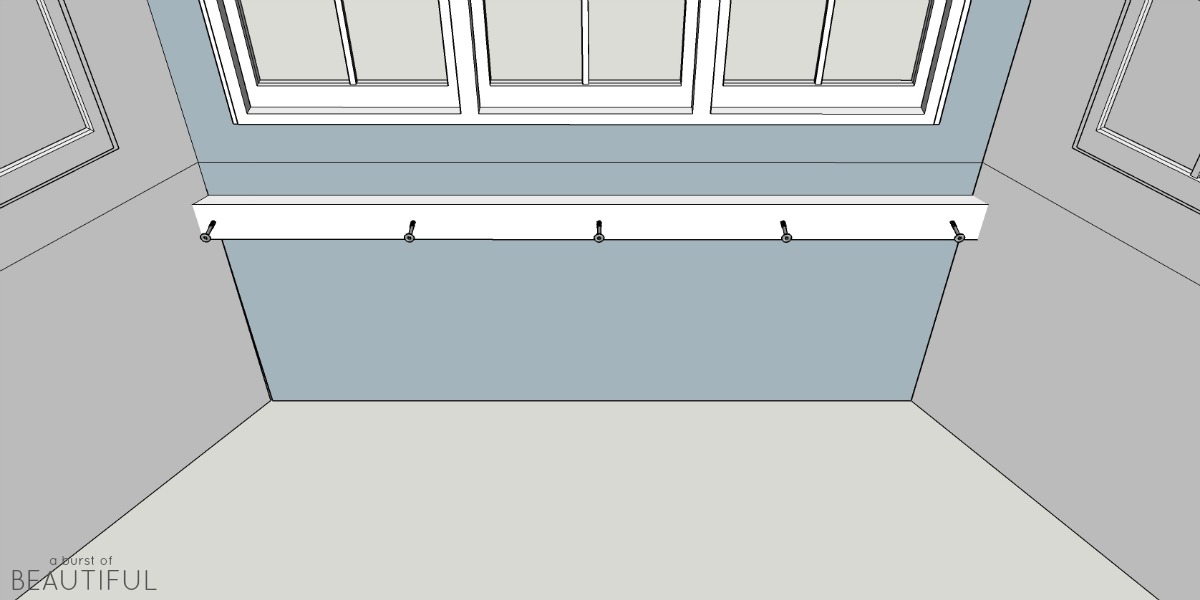
- Mark the height of the frame at several points along the walls. Then use a level to draw a line around all three walls of the bay window. You may not hit the marks you’ve drawn, but it could be that your floor isn’t level. That’s ok because the goal is to make the top as level as possible.
- Using a stud finder, locate all of the studs in the bay window and mark them above the line you’ve just drawn.
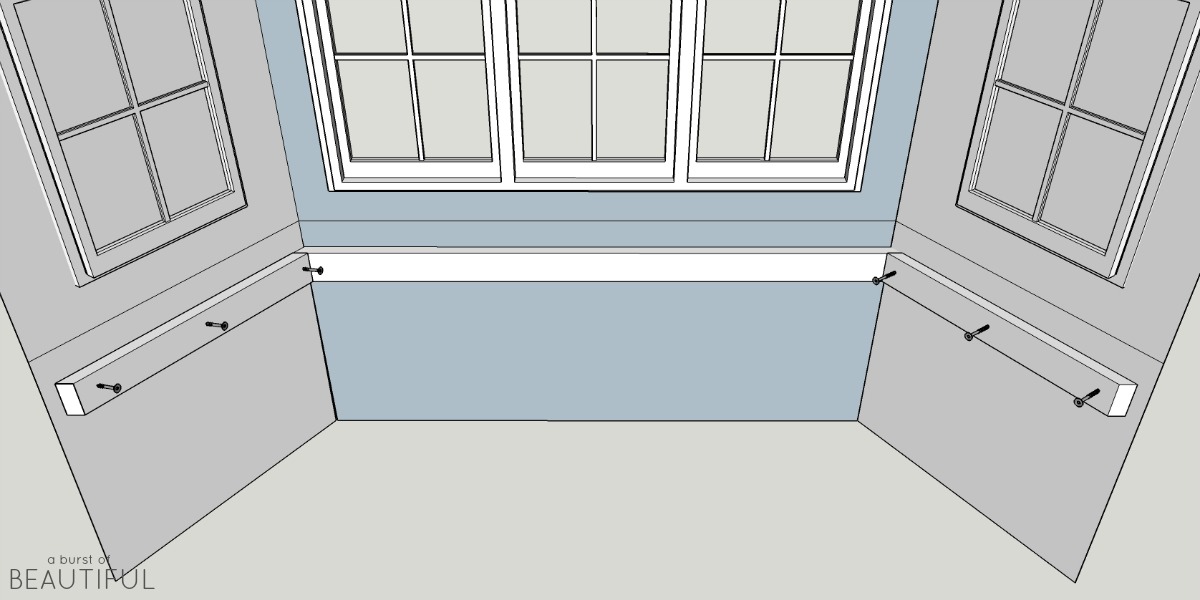
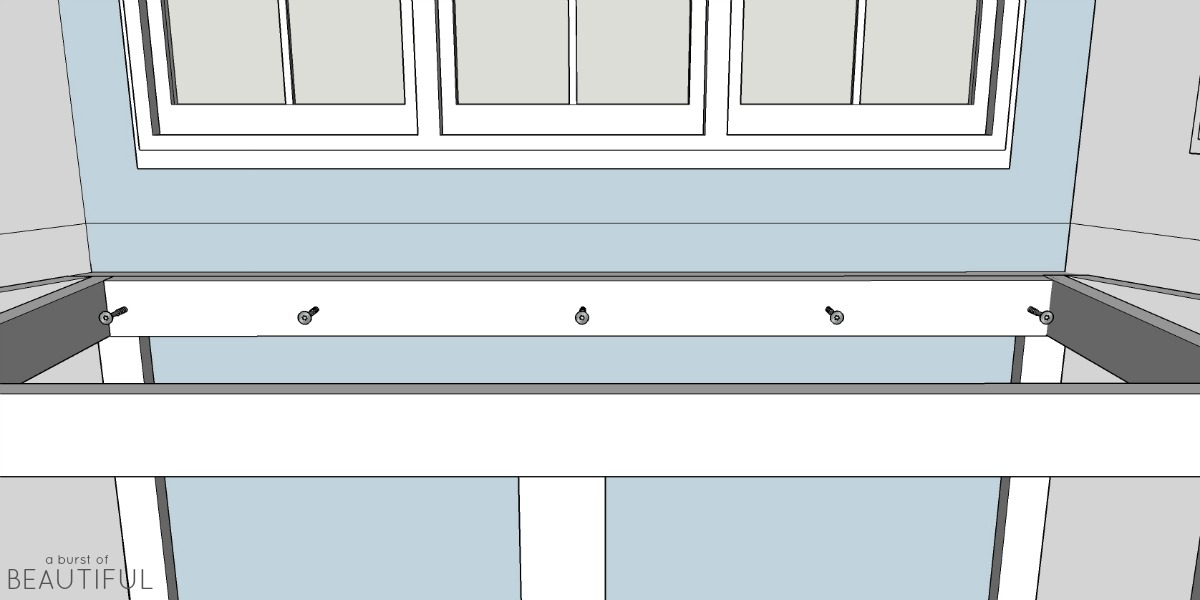
- Measure and cut a piece for the center wall with the proper angles to match the wall on either end. For example, if your wall angle measures 135°, then each end should be cut at 45° (total of 180°). Screw into the studs using 2.5″ screws.

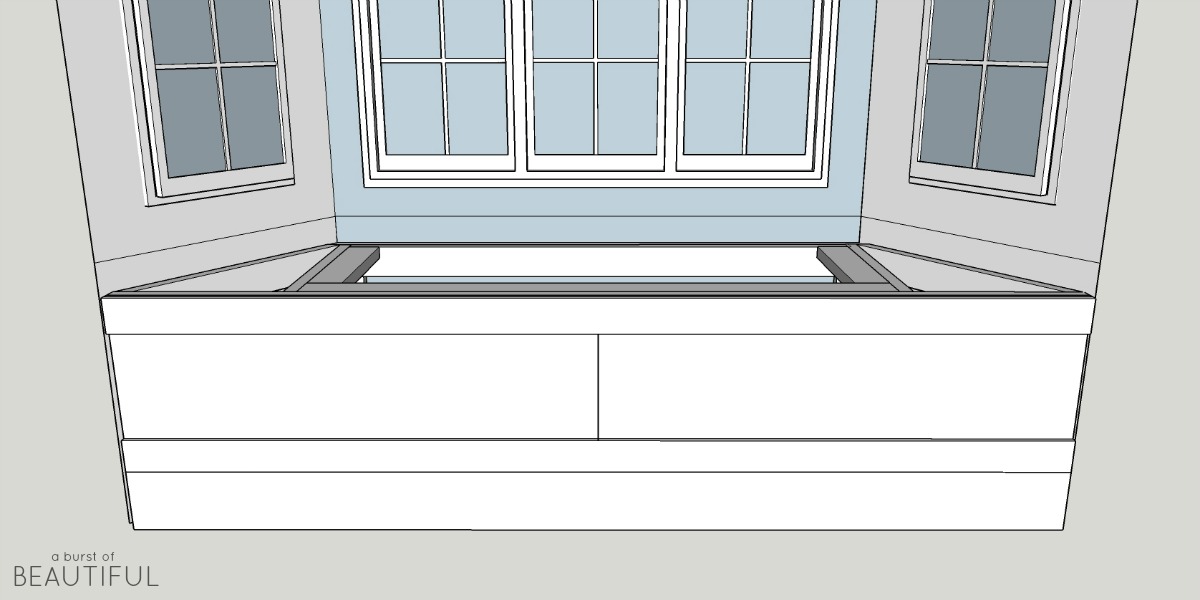
- Then measure the length from the piece you just installed to the outside edge of the wall. Deduct 2″ for the depth front span piece, 1/4″ for the plywood face and 5/8″ for the trim you will be attaching later. Cut each end using the same angle you used in the previous step, but they will both be cut in the same direction as shown in the diagram below.

- Measure and cut two 2″ x 4″s to fit in the corners for added support at the back. Screw into studs using 2.5″ screws.

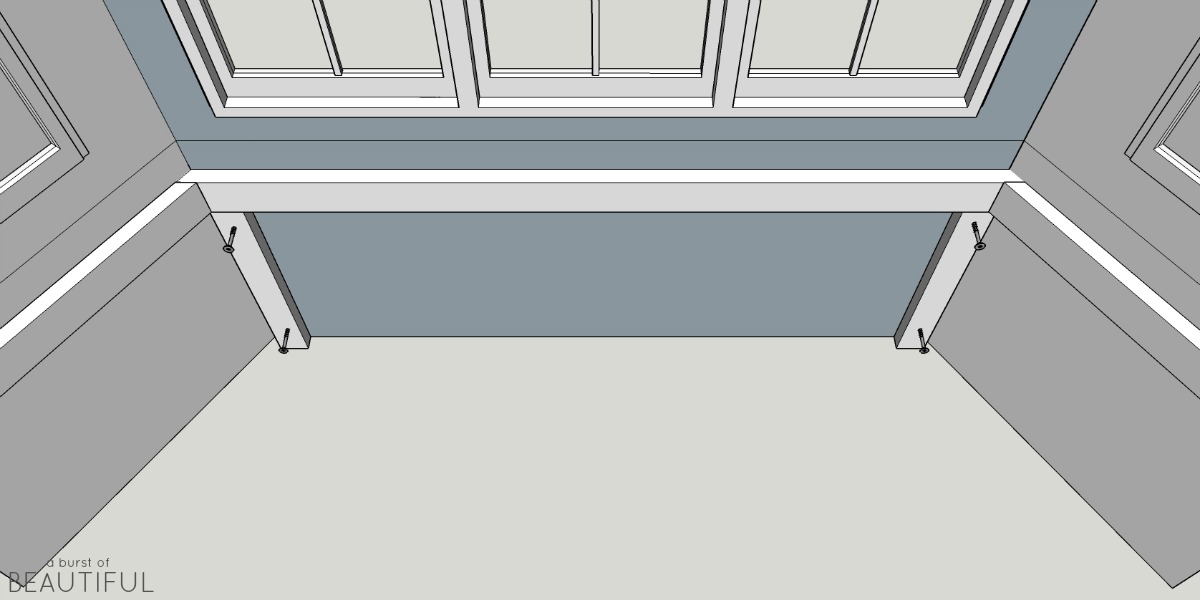
- Measure from one end to the other and cut a 2″ x 4″ to length for the front span. You can add angled ends to match the wall, however, I just left ours at 90°. Attach to the side supports using 2.5″ screws.

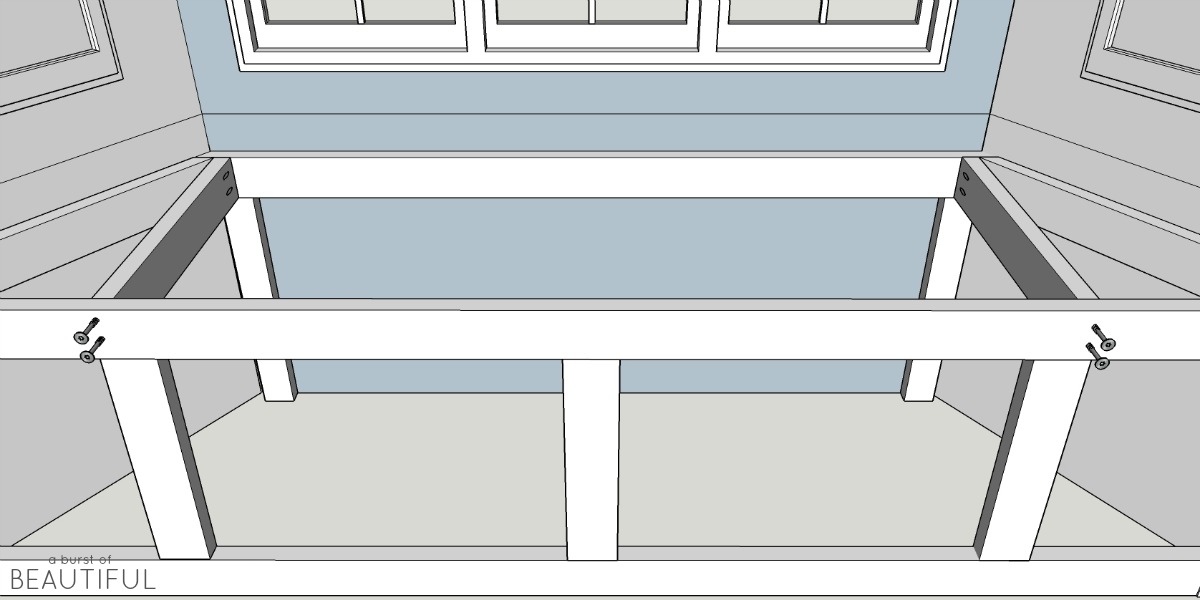
- Measure from the bottom of each side of the front span to the floor and cut two 2″ x 4″s to these measurements. Drill two pocket holes on one end of each. If you don’t have a Kreg Pocket Hole System from The Home Depot (which we couldn’t live without now that we have one) you can simply toenail the screws instead of using pocket holes. Secure to the bottom of the front span using 2.5″ pocket hole screws. Then, measure the length along the floor between the two end pieces. Cut a 2″ x 4″ to length and drill two pocket holes on each end. Secure to the end pieces using 2.5″ hole screws.

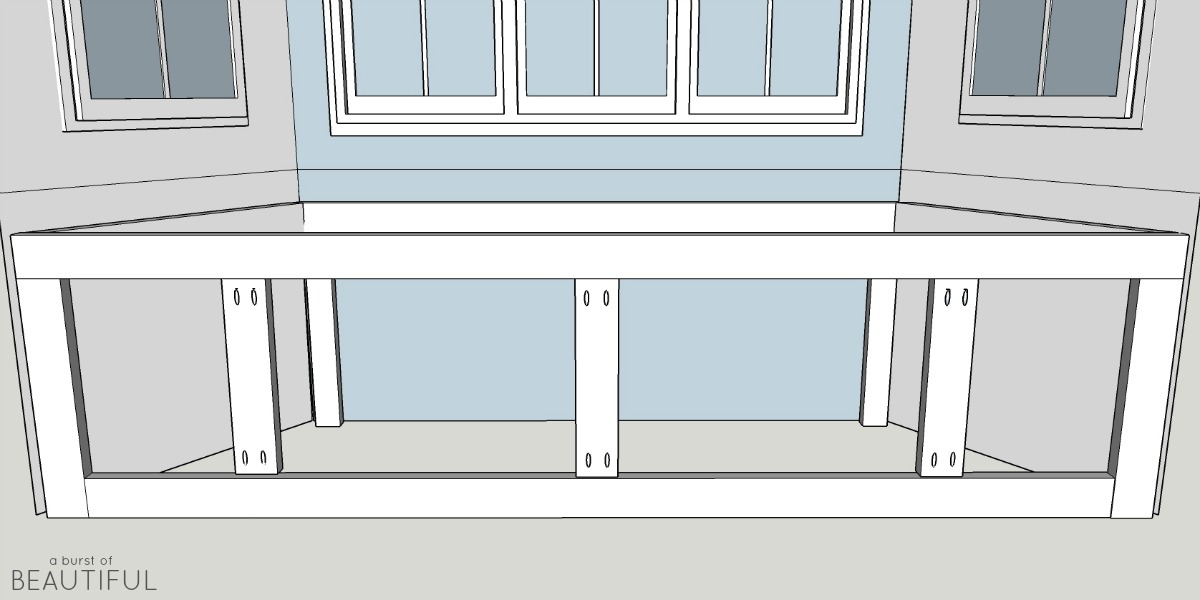
- Find and mark the mid-point of the front spans. Measure the distance between the top and bottom and cut a 2″ x 4″ to that size. Drill two pocket holes on each end of the board. Secure in place with 2.5″ pocket hole screws. Then find and mark the mid-point between the center piece you just attached and each side of the bench. Measure, cut, drill and attach these pieces the same way you did the center piece.

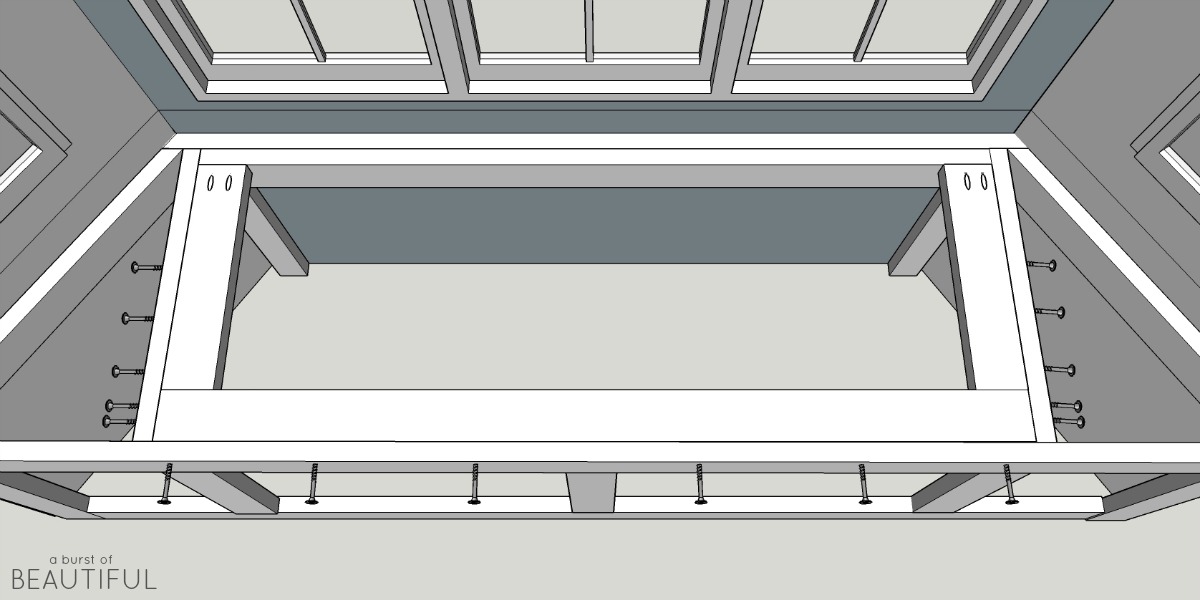
- Measure from the back corners to the top front span. Cut two pieces of 2″ x 4″ to fit and drill two pocket holes on one end. Insert and square them up as shown below and use 2.5″ pocket hole screws to secure the back and drill through the front span with 2.5″ construction screws to secure in place.

- Measure between the two pieces you just installed. Cut a 2″ x 4″ to size and secure to the back of the frame with 2.5″ construction screws.

- Cut a 2″ x 4″ to fit the front area between the side supports. If your bench is square it will likely be the same length as the board you installed in the last step, but measure again just to make sure. Secure it with the 2″ side against the front span with 2.5″ constructions screws. Then measure for the pieces that run front to back on each side. Drill pocket holes on one end of each board and screw in place using four pocket hole screws and three construction screws along each side as per the diagram below.

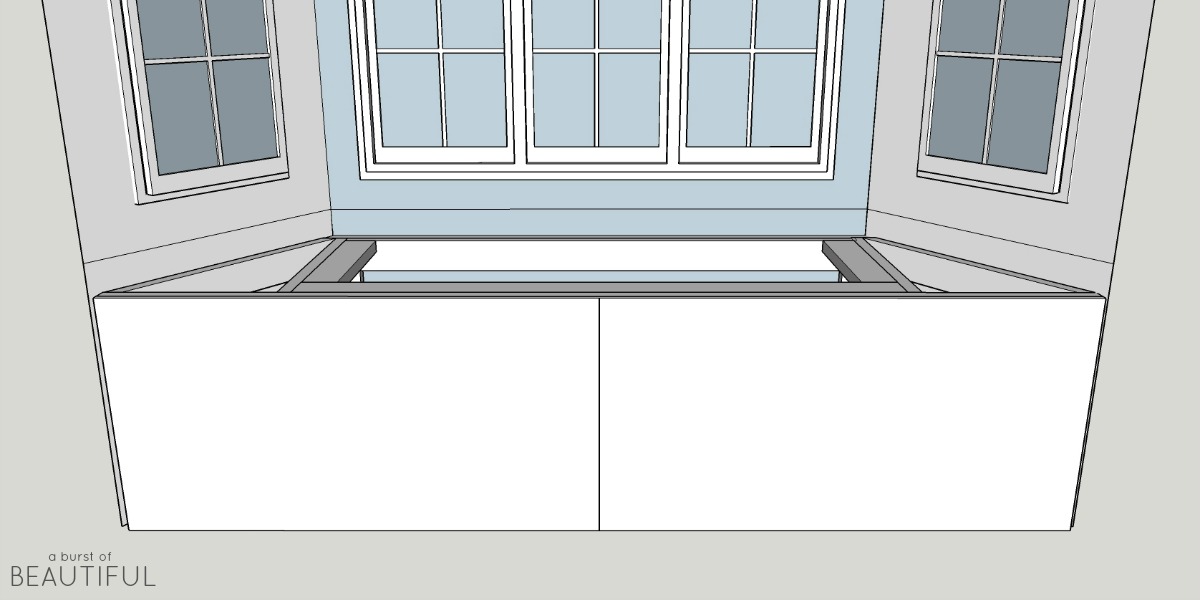
- Cut the 24″ x 48″ x 1/4″ plywood sheets down to size. We used two panels and joined them in the center where they will be covered with trim, but you can buy a single 4′ x 8′ x 1/4″ sheet and cut it down to fit if you prefer (24″ x 48″ sheets fit better in a car). Using an air compressor and brad nailer, secure the panels to the front frame using 1 1/4″ brad nails. Nail in places that will be covered by the final trim so that you don’t have to fill as many holes.

- If you are going to attach baseboard trim to the bottom of your bench, you will need to bump it out by 5/8″. Cut a piece of scrap 5/8″ plywood to the height and length of your baseboard and attach them to each other with brad nails and glue. Then add a 1″ x 4″ MDF board on top of it, and another one at the top of the bench using glue and brad nailer with 1 1/4″ nails.

- Add the baseboard back to the bottom, and then cut three 1″ x 4″ boards for each side and the center to cover the seam of the plywood. Use brad nails and to secure them to the front. NOTE: If your bench is really wide, you can also divide the two boxes to make a total of 4. Simply cut two more 1″ x 4″s down to size and center them in each of the boxes.

- There are two ways to complete this next step. If you do not want to use the bench for storage, you can simply cut a single piece of 5/8″ plywood to fit the seating area and add a piece of decorative 5/8″ trim to the face edge to finish the look. Or, you can add hidden storage as we did. This part will be a bit of a jigsaw puzzle. The way we did it was to first attach the front lip piece to ensure that the front was square. This front lip made it possible to hide the seams of the lid. It’s a 1″ x 4″ MPF piece that we made overhang the front by 1/2″. We added angles on the edge of this piece to match the angle of the wall to give it more of a finished look. Secure it with glue and brad nails. We then cut the sides of the seat out of the MDF shelf board. There are a couple of ways to do this. You could trace a template on a large piece of paper and then transfer it to the wood. The other method is to measure the length from the wall to where the side supports are located at the front edge (along the inside of the front lip piece). You don’t want to cover all of the side supports, only about half of it. The other half will support the lid when it is closed. You can also use an angle finder (or if you don’t have one, attach two 2″ x 4″s at one end with one screw so that you can open it up like a big angle finder). Place one board along the front lip piece, and rotate the other to match the angle of the wall. Hold the angle of the 2″ x 4″s and transfer to your wood. Cut it out carefully using a circular saw. Cut a piece of plywood or MDF using a jigsaw for the back piece that runs against the wall. The goal is to create an absolute square hole for the lid to fit in. If your back wall isn’t straight or the top is not exactly square, then this is where you will make adjustments. You’ll also want to make sure that some of the supporting 2″ x 4″ will still be visible so it can shoulder some of the seat weight.

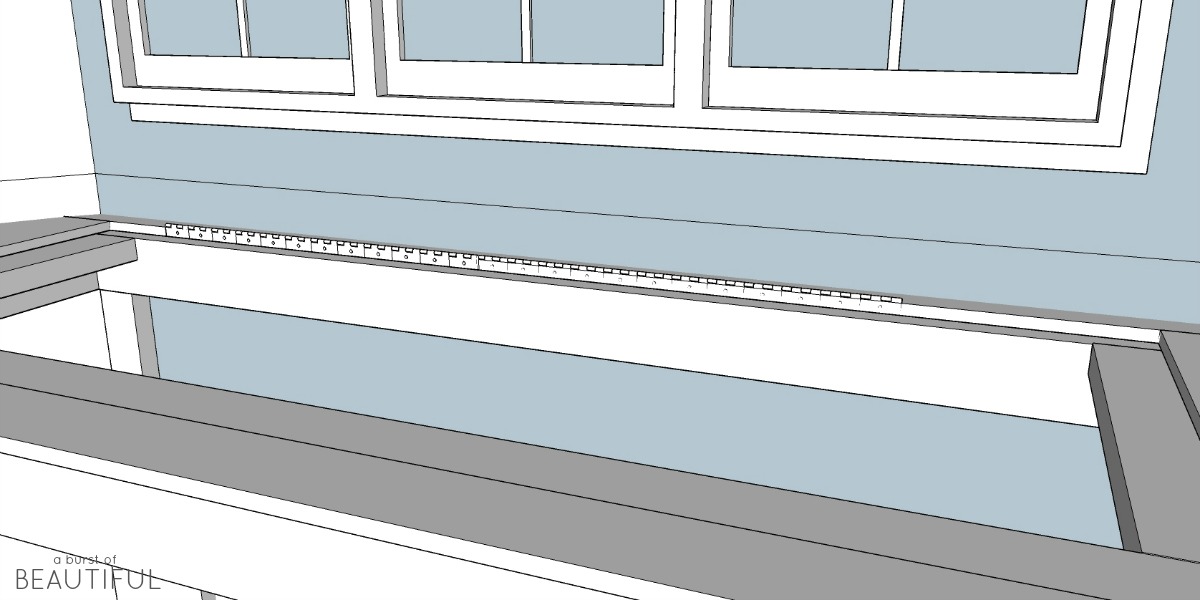
- Install the piano hinge to the front of the back 5/8″ piece you just installed with the hinge facing up. Be careful to attach it in the correct orientation so that your lid swings upwards. Measure the opening for the lid. Reduce each side by 1/8″ to give it some clearance. Cut the lid out of your shelf board or plywood. On the face side of the lid, drill a 7/8″ hole in the center about 2″ from the front edge. This will be how you will lift the storage lid. Make sure you do this before you test the fit of the lid, or else you’ll have a hard time removing it again. Once you’ve tested it for fit you’ll want to have someone help you hold the lid up on an angle so that you can attach the hinge to the back edge of the lid.

- Caulk around all seams and edges, except for the lid. Fill the brad nail holes with wood filler. Allow to dry and then paint with your trim color. If you have larger than normal gaps around the wall, you can use cover trim like we did to cover the spaces and give it a more finished look.

- Find someone to make you a cushion! We didn’t even attempt this on our own. We had a local upholsterer make us one for under $200! These can get quite expensive so make sure you shop around.
Well, that was a lot of explaining! If you decide to tackle this project in your house and you have any questions, we would be happy to try and help you out! Just send us your questions and comments below. And we’d also love to see how yours turns out!
Nick








Alexandra Salcedo says
Hi, I bought a bench to fit into our kitchen nook. Right now it’s very simple looking, basically the skeleton of the bench (although extremely heavy and sturdy). Could I send some pictures over and get some suggestions on how to add some pieces or frames to make it more appealing? Any help is extremely appreciated!
Alicia says
Hi Alexandra, of course, send us an email and we are happy to give our input! 🙂
Vijaya Bodd says
Where did you buy the bench with basics?
George says
While every bench seat will be different, can you post the dimensions for the panels? Its hard to tell how tall each panel is between the 1×4 surrounding them. What would you say is the minimum height for it not to look odd?
Nick says
Hi George, are you referring to the panels on the top (seat) or the front panels? As for the height, I think somewhere around 17-18″ would be a good minimum. A typical chair is 18″ so that should give you a frame of reference!
Celine says
Ho, thanks for your blueprint and details. I’m a mom and I’ve never built anything, but I m good at sewing and making sewing patterns. I figure that a plan is a plan, whether it be in fabric or wood, so I’m looking at your plan for inspirayion and guidance. This helps me plan and draw a corner shelving unit for our 4 year old daughter. Wish me luck! 🙂
Nick says
Hi Celine,
That’s exactly the way I think too! I’ve had to grab the sewing machine before to fix something and I look at it as just another power tool! 🙂 Good luck on building this!
Jeff says
Would you be able to provide pictures or more details of how you installed the piano hinge?
Nick says
Hey Jeff, I’ll send a few pictures to your email today!
Johanna says
Thank you, exactly what i was looking for, starting it today.
Alicia says
We’d love to see your finished project, Johanna! Send us an email with photos if you can! 🙂
Trey Geiger says
Building this in “spare” time over the coming weeks – thanks for the detailed plans! One question: what’s the max width of the seat that you suggest (based on what the shelving MDF material can support without the 2×4 reinforcements? I have an 8 foot span and pretty sure I need to divide it into thirds, but want to confirm.
Nick says
Hey Trey, yes I would definitely divide it into more manageable pieces. I would suggest that 32-36″ should be your max, but it also depends on how many people could be sitting on it. You could always add extra 2×4 reinforcements across the middle of each opening. It will affect the size of items you can store in the bench, but might add a little more security (and confidence)! Hope this helps and we’d love to see a photo of the final piece!
Troy says
These are great instructions! Used them to build a window seat measuring 138” in our home-we love it!
Nick says
Glad you found them helpful Troy! If you have a picture, send it our way!
Alex Taylor says
In step 3 of instructions 20″ – 5/8″ -2″ = 18 3/8″, shouldn’t that be 17 3/8″?
Nick says
Hi Alex,
Yes, thank you for pointing that out! I recently reformatted the steps to make it easier to follow and must have made a typo!
Thanks!
Jackie says
Beautiful seat! What is the depth of the sitting area? Your bay window seems similar to mine. Do you lean on the window at all when sitting there? Trying to assess likeliness of sitting on it and enjoying the view.
Nick says
Hi Jackie,
Off the top of my head, I think it’s about 22″ deep. Sometimes we lean on the window a bit, but usually the pillows we are supported by the window sills all around, so we’re not putting much pressure on the windows.
Ivory says
I love this project, and it’s fabulous
Alicia says
Thank you, Ivory, so glad to hear that!
Anthony says
Great job, it looks fantastic. In the pics I noticed you have hardwood flooring beneath the bench. Was it already there or did you decide to install it during this project. We would like to build a similar window bench but just pulled out the carpets with plans to install hardwood and are faced with the decision: do we install the floors first then build the bench on top or build the bench first then install the flooring around. Would appreciate your feedback, thank you!
Alicia says
Hi Anthony, we built the window bench over our existing hardwood floors as it was already installed prior to us building the window seat. If you ever plan on removing the window seat I would install the hardwood floor first, to save yourself any trouble down the road. I hope that helps answer your question, and please don’t hesitate to reach out if you have any other questions!
Carrie Bailey says
wondering what kind of material did you use to make your seat cushion for your reading nook? Or did you buy the cushion premade? Just wondering about moisture issues and such.
Alicia says
Hi Carrie, we had the cushion for the window bench made by a local upholster. He used a piece of 2-inch foam and covered it in material he already had on hand. We haven’t had any issues with moisture, etc. If your window bench is a rectangle, I know you can purchase cushions online, we had ours made because it was a custom shape/size. Let me know if you have any other questions!
ivory says
I love your widow bench/storage. So well done. I love everything about it. My hubby built tow for me in our bedroom. One over each window. The only problem I have with them, they are so heavy to/when lifting the top. What can I do to make it easier to open, and not have the seat portion so heavy when lifting. it’s the same size as yours, but not as beautiful.
Nick says
Hi Ivory,
You could look at installing a “stay” mechanism. If you look up “lid stay” you may find something that could help you out!
Ivory says
Thanks Nick! We will give this a try, and let you know the outcome.
Stay safe!!!
Christy says
Love it!! What color is the seat painted? Beautiful
Alicia says
Thank you, Christy! It is Simply White by Benjamin Moore.
Paul Enfroy says
In step 10, there is no mention of attaching the upright 2x4s to the wall, or of attaching the bottom spanning 2×4 to the floor. This seems unstable. Am I missing something? Thanks!
Nick says
Hi Paul, sorry for the late reply. We only attached the upper portion to the wall around the back. We didn’t attach the front pieces to the wall or floor. The simple reason is that I knew that some day my wife may decide to change the design of the room and I didn’t want to have to fill in holes on the floor!
Joe says
This is exactly what I was looking for, thanks. Have the exact same shaped bay window in the living room in my new house, I was thinking it’s just wasted space. Unfortunately there’s a radiator attached to the wall under the window, in the nook. So am contemplating whether it’s worth the hassle to have someone move the radiator, so I can build a bench like this.
Alicia says
So glad you found it, Joe! Let us know if you give this project a go! 🙂
Komal says
Hi, i was looking for a window bench guide and found this very helpful. I have a quick question if you can help. When attaching the bench to the wall do i have to check with any detector like where exactly to hit nails? This is our new house so i am a little concerned. Please help.
Nick says
Yes, I would definitely use a stud finder to find the proper locations to attach the wood to!