A modern silhouette and clean lines make this outdoor chair the perfect addition to any outdoor living space. Find the free plans to build your own here.
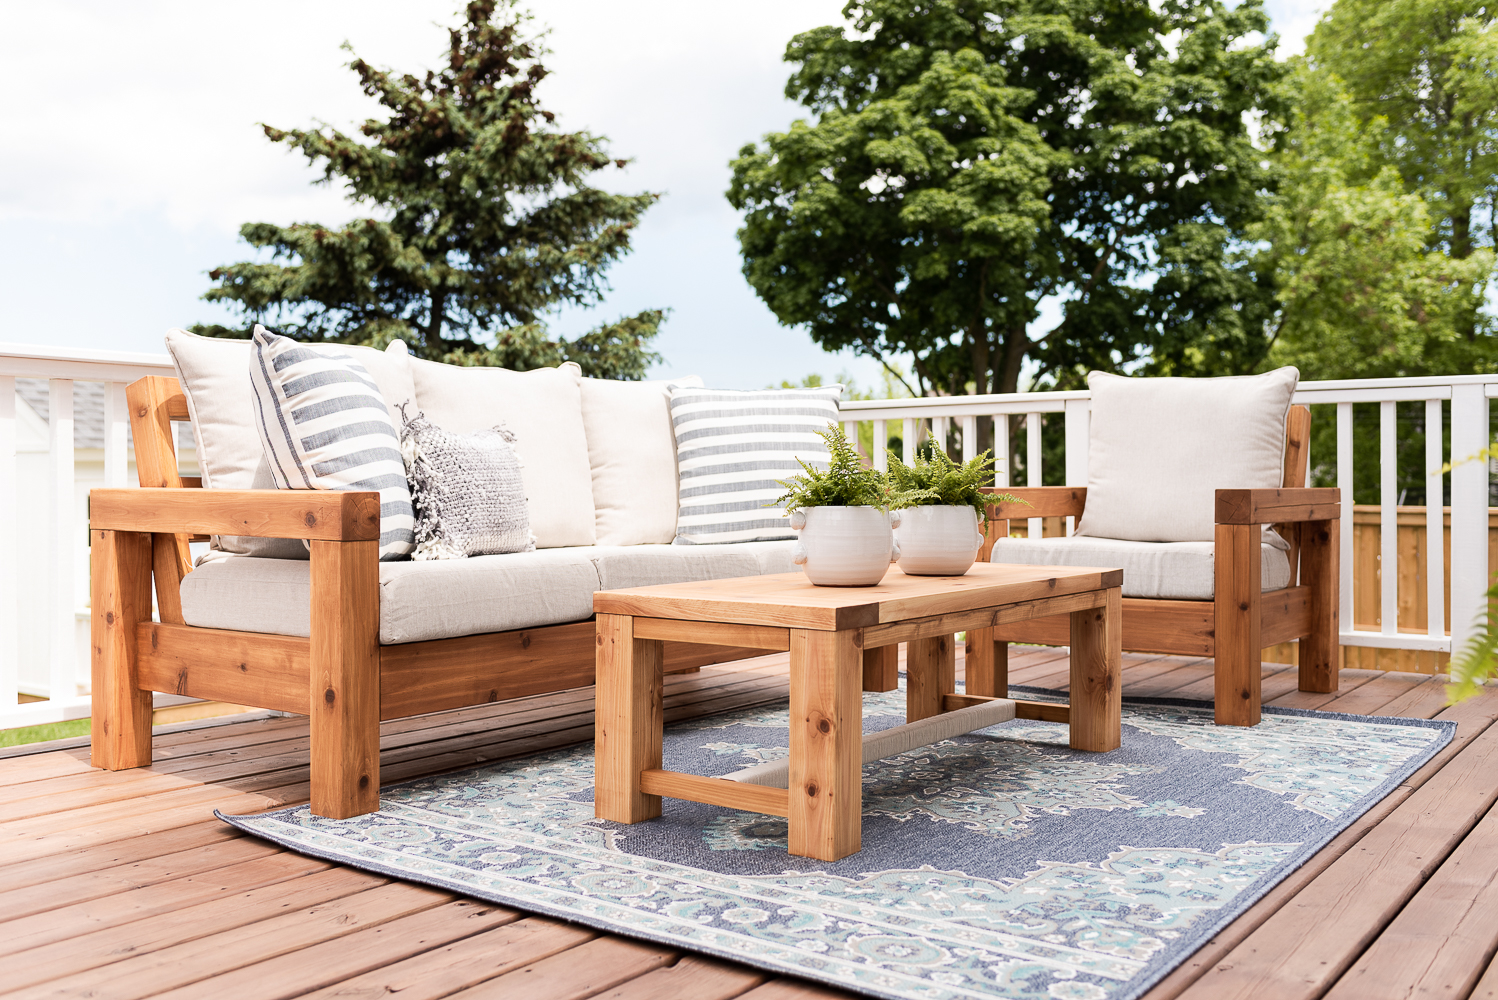
You can also find our plans for the matching outdoor sofa and coffee table!
We really believe in making the most of our outdoor living space and know what a difference it can have in the way we use and enjoy our home. And while it’s taken a while, our backyard is finally starting to feel like the peaceful space we’ve always envisioned.
It began last year as we enclosed the backyard with a fence to provide privacy and create a safe place for our girls to play. And to keep them busy Nick built a beautiful swing set and playhouse for them to enjoy. They absolutely love it, and it was definitely worth the time and cost to create (we will be sharing the plans for both in the coming weeks).
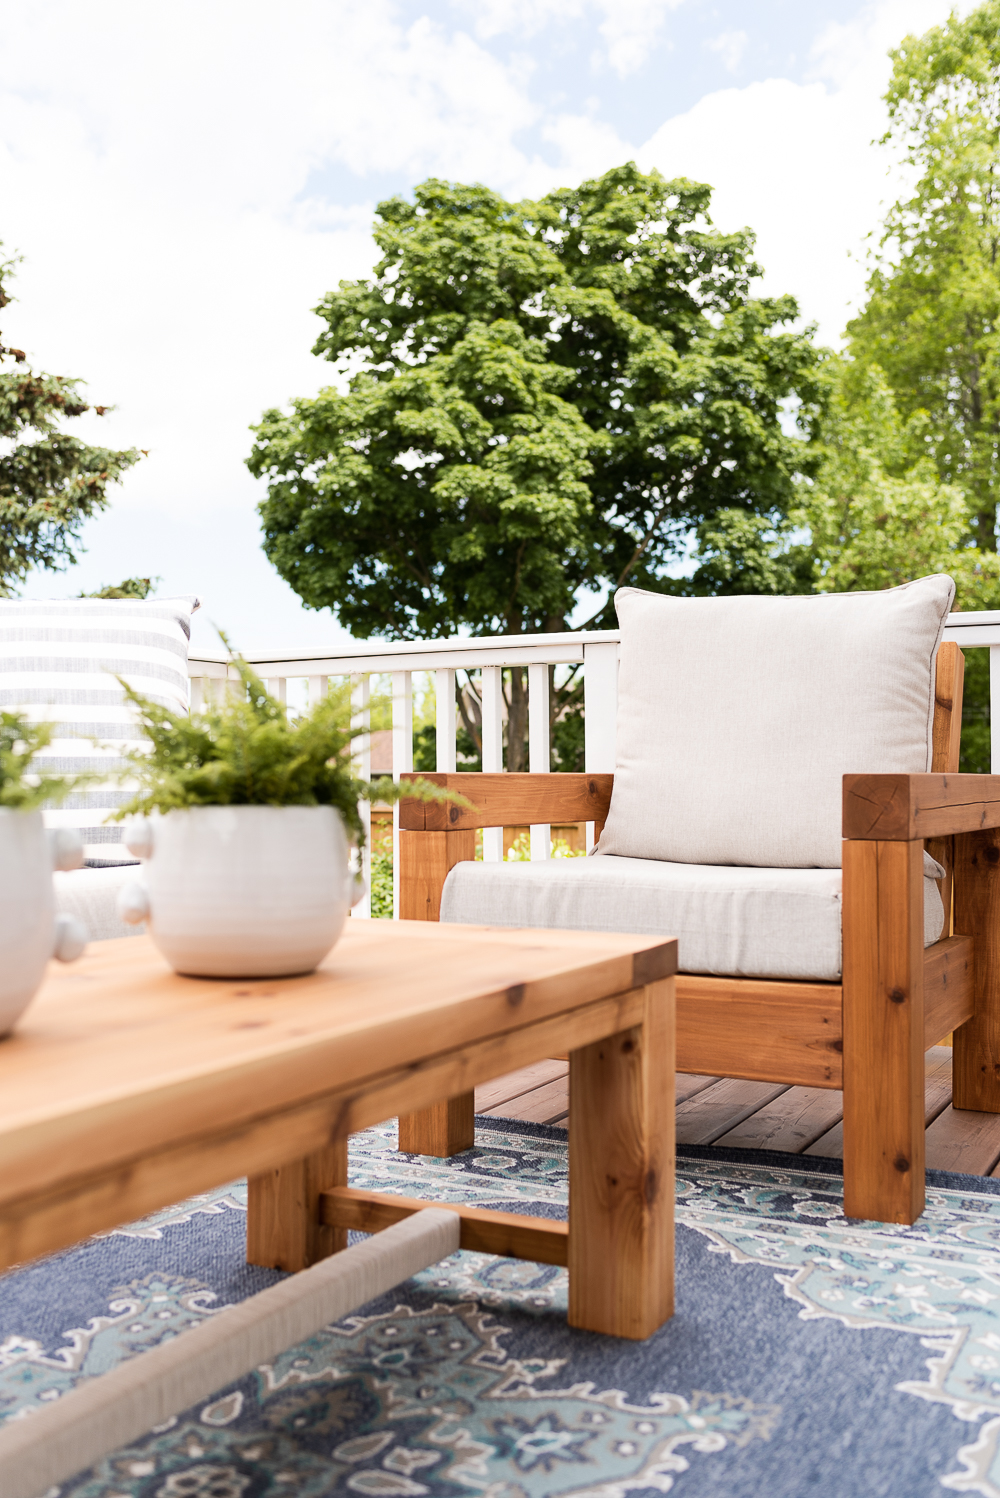
This year we focused our efforts on creating an inviting and comfortable space to relax and entertain outside (see our outdoor design plan here). To start, Nick built this incredible outdoor sofa, chair, and coffee table for our deck. He worked so hard on these pieces to make sure they are both comfortable and beautiful. To learn more about the materials and design choices we made, read our post on The Perfect Outdoor Sofa.
Pair this chair with our outdoor sofa and coffee table to complete your patio. We also offer plans for our patio bar, it’s perfect for hosting outdoor get-togethers or as a BBQ prep station.
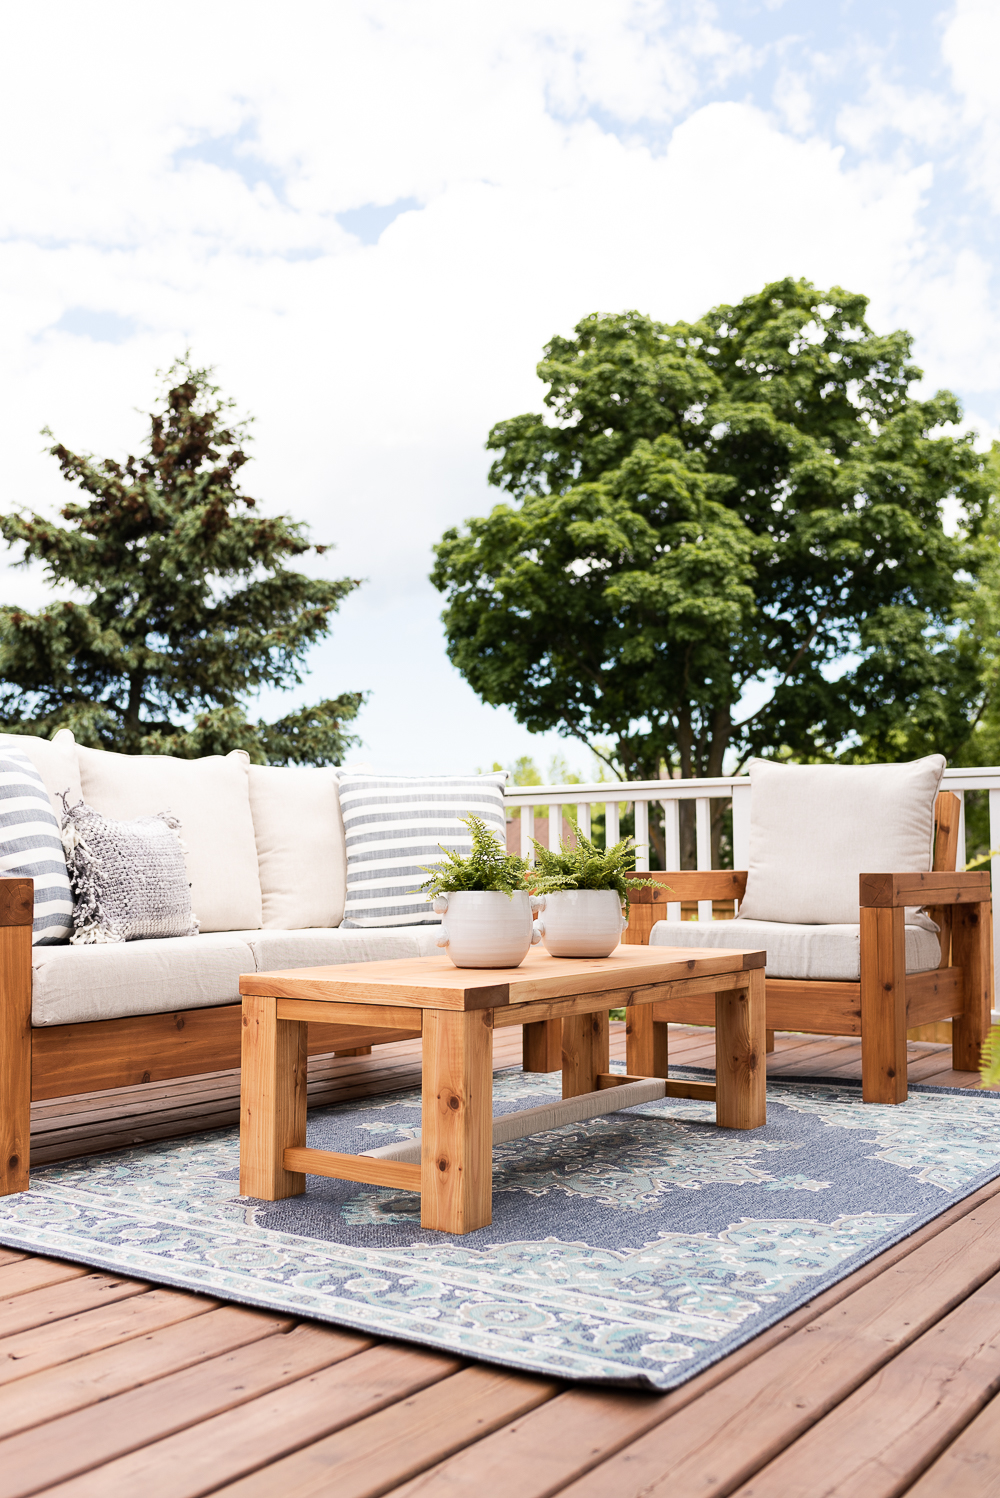
Details at a Glance
- Sofa (DIY)
- Chair
- Coffee table (DIY)
- Sofa and chair cushions
- Rug
- Striped pillows
- Lumbar pillow
- Planters
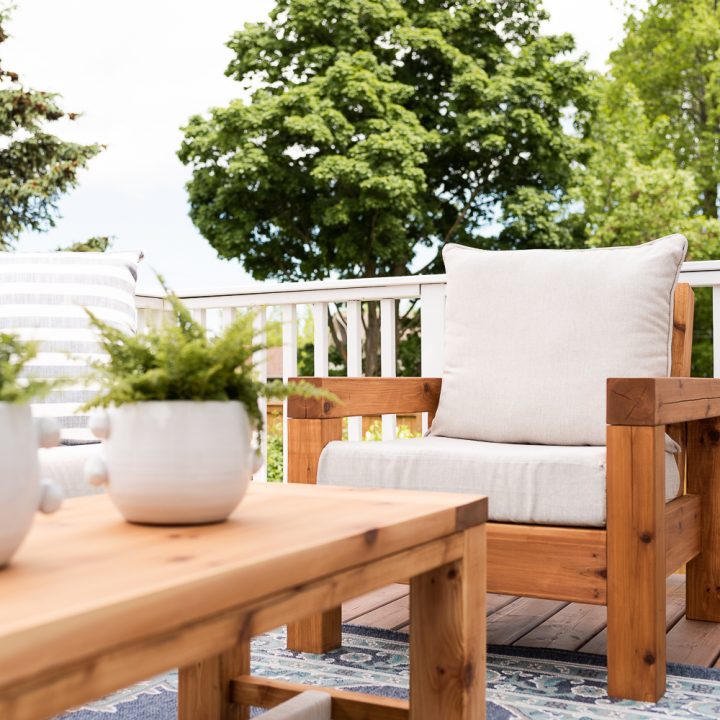
The Perfect Outdoor Chair | Free Plans
Take a weekend to build yourself some beautiful, long-lasting patio, high-quality patio furniture.
Materials
- (2) 4 x 4" x 8' Cedar Posts
- (2) 2 x 4" x 8' Cedar Boards
- (1) 2 x 6" x 8' Cedar Boards
- (1) 5/4 x 6" x 8' Cedar Deck Boards
- (40) 2-1/2" Kreg Blue Kote Pocket Hole Screws
- (8) 3" Deck Screws
- (34) 2-1/2" Deck Screws
- <Waterproof Exterior Wood Glue
Cut List:
- (2) 4 x 4" x 32" Arms
- (4) 4 x 4" x 19.5" Legs
- (2) 2 x 6" x 25" Bottom Side Spans
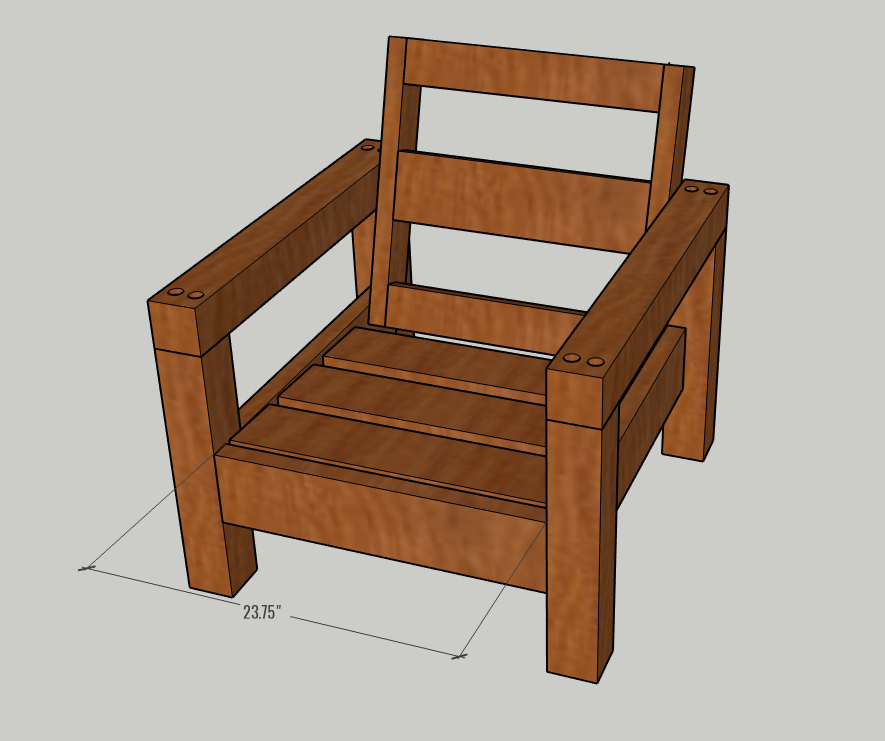
- (1) 2 x 6" x 23.75" Bottom Front Span
- (1) 2 x 4" x 23.75" Bottom Back Span
- (3) 2 x 4" x 19.5" Bottom Seat Supports (2° Angle on Each SIde)
- (2) 2 x 4" x 23" Back Side Supports
- (2) 2 x 4" x 20.75" Back Top & Bottom Spans
- (1) 2 x 6" x 20.75" Back Mid-Support
- (3) 5/4 x 6" x 23.75" Seat Boards
Instructions
- STEP 1: ASSEMBLE ARMS AND LEGS

On each ARM piece, drill holes in the locations shown on the diagram using a 1" spade bit. Drill to a depth of approximately 1". Then pre-drill in the center of the hole as far down as you can using a 1/8" drill bit. Clamp arm and legs together and secure with waterproof wood glue and 3" deck screws. Squeeze some glue in the hole and then using a rubber or woodworker's mallet, gently tap the dowels into the holes until they feel secure. Then cut off the excess with a dovetail saw or flush cut saw. Sand smooth. - STEP 2: ADD BOTTOM SIDE SPANS

Drill pocket holes as shown on each piece. Measure 6-1/2" from the bottom of each leg. Attach BOTTOM SIDE SPANS ensuring the sides with the pocket holes are flush with the legs (these will be hidden on the inside of the piece when complete). Use waterproof wood glue and 12 x 2-1/2" Blue Kote pocket hole screws. - STEP 3: ATTACH BOTTOM FRONT AND BACK SPANS

On the BOTTOM FRONT SPAN, drill 3 pocket holes on each end of the piece, ensuring the holes are on the same side of the board. Mark 6-1/2" from the bottom of each leg. Attach the BOTTOM FRONT SPAN with the pocket holes facing the inside with waterproof wood glue and 2-1/2" Blue Kote pocket hole screws. Drill 2 pocket holes on each end of the BOTTOM BACK SPAN, ensuring pocket holes are on the same side of the board. Mark 19-1/2" back from the inside of the BOTTOM FRONT SPAN. Attach BOTTOM BACK SPAN in that location, flush with the bottom of the SIDE SPAN board. Secure with waterproof wood glue and 2-1/2" Blue Kote pocket hole screws. - STEP 4: ATTACH BOTTOM SEAT SUPPORTS (LEFT)

Attach a BOTTOM SEAT SUPPORT on the left-hand side. Each end should be cut at a 2° angle as shown in the diagram. Mark 1-3/8" from the top of the BOTTOM FRONT SPAN. Line up one BOTTOM SEAT SUPPORT to that line and it should meet flush to the BOTTOM BACK SPAN. Secure directly into the LEG and BOTTOM SIDE SPAN with four 2-1/2" deck screws. - STEP 5: ATTACH BOTTOM SEAT SUPPORTS (RIGHT)

Attach a BOTTOM SEAT SUPPORT on the right-hand side. Each end should be cut at a 2° angle as shown in the diagram. Mark 1-3/8" from the top of the BOTTOM FRONT SPAN. Line up one BOTTOM SEAT SUPPORT to that line and it should meet flush to the BOTTOM BACK SPAN. Secure directly into the LEG and BOTTOM SIDE SPAN with four 2-1/2" deck screws. - STEP 6: REMAINING BOTTOM SEAT SUPPORT

On the remaining BOTTOM SEAT SUPPORT, drill 2 pocket holes on each end of the board. Attach the BOTTOM SEAT SUPPORT in approximately the centre of the seat base. Each end should be cut at a 2° angle as shown in the diagram. Mark 1-3/8" from the top of the BOTTOM FRONT SPAN. Line up one BOTTOM SEAT SUPPORT to that line and it should meet flush to the BOTTOM BACK SPAN. Secure with waterproof wood glue and 2-1/2" Blue Kote pocket hole screws. - STEP 7: ASSEMBLE BACK

For the back, all pocket holes should face the rear of the piece. Assemble back as shown, starting with the BACK SIDE ENDS to the BACK TOP AND BOTTOM SPANS. They should be flush with the front of the BACK SIDE ENDS. Attach with waterproof wood glue and 2-1/2" Blue Kote pocket hole screws. Add the BACK MID-SUPPORT as shown using waterproof wood glue and 2-1/2" Blue Kote pocket hole screws. - STEP 8: SECURE BACK TO CHAIR

(You might need some help with this part). Use a helper and clamps to position the bottom of the back 23-3/4" from the front of the BOTTOM FACE SPAN. This will allow your 24" cushions to overhang by 1/4". Then rotate the back until it is approximately a 17° recline from the HORIZONTAL SIDE SPAN (or 19° if you're using the seat base as your guide). Secure with 2-1/2" deck screws into the HORIZONTAL SIDE SPAN and back LEG on both the left and right side (4 screws on each side). - STEP 9: ATTACH SEAT BOARDS

Attach SEAT BOARDS, spacing approximately 1" apart (doesn't have to be perfect - use your judgement). Secure with 2 1/2" deck screws into ALL of the BOTTOM SEAT SUPPORTS. Will require a total of 18 screws for this step. - STEP 9: SAND & FINISH

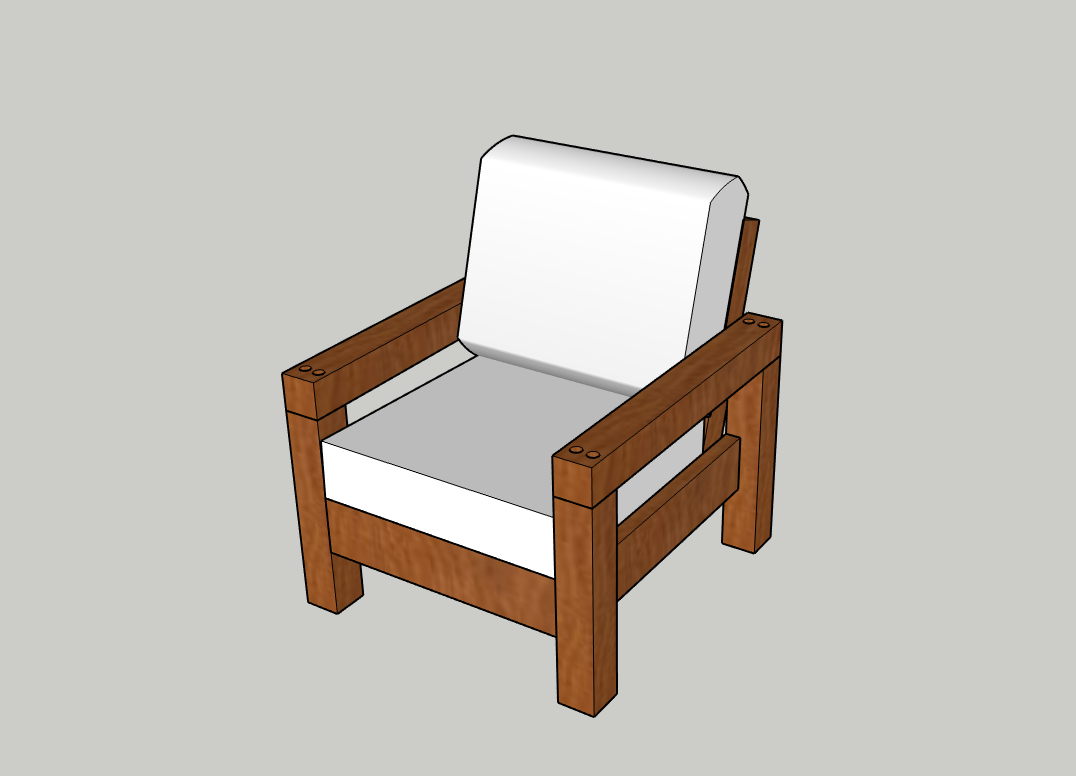
Sand with 120-grit sandpaper, then 220-grit sandpaper. Finish with some kind of sealer or wood penetrating oil (we used penetrating oil from BEHR). Allow to dry and add your cushions. Enjoy all summer long!





David Haft says
What is the seating dimension of the seat and back both depth and width? Most cushions seem to be 24×24 which would seem to be too big for this
Nick says
Hi David, sorry for the late reply! Yes, we used 24×24″ cushions for this project. The seat width is 1/4″ narrower than the cushion. This just helps keep it in place and secure during windy weather. The depth allows for the cushion to overhang the front by about 1/4″ as well. This ensures that the back of your legs will not be resting on the wood at the front.
Jason says
I’m confused by the 2 degree angle you list. Which direction is the angle cut from the diagram below? Does it cut internally from the top down on both ends? One end, and opposite at other?
Nick says
Hi Jason,
Yes, if you’re looking at the diagram and you were to take the side that has the 19.5″ label on it, you would put that against the fence of your miter saw and slide your saw 2° to the left and make your first cut. Then slide the board 19.5″ to the left and make the same cut. I hope that clears it up!
Jeff Spurgin says
Hi Nick,
My wife and I are considering this set for our patio and a project in the next few weeks. But I don’t really have any woodworking experience, but this looks like an easy enough introduction project. My biggest question though, I don’t have a miter saw, but I do have a circular saw. Would that be able to make all the cuts I’d need for the sofa, chair and table?
Does the type of wood make a big difference? We just moved and I don’t know any local lumber yards, but the Lowe’s in town doesn’t appear to carry any cedar, mostly pine, Would that work too since I plan on staining it anyway?
Thanks!
Nick says
Hi Jeff,
Sorry for the delayed reply! I don’t think a circular saw would give you the amount of depth needed to cut through the 4×4’s. They usually only cut to a dept of 2 1/2″ and you need the capability to cut a full 3 1/2″ to make a nice clean/straight cut.
Yes, the type of wood really does make a difference. Cedar is very hard to get these days because so many people have been doing DIY projects in their backyards over the last 6 months. Pine would be a no-no because even the slight bit of rain will make it break down really quickly, even if it’s stained. I would stick with cedar or if you have no other option, I would use pressure treated lumber then when it dries out after a few weeks you can stain it.
Christy Koenig says
Hi- this project looks wonderful! How high is the top of the seat cushion from the ground? My current outdoor couch cushion is 18” off the ground and I like that height for seating. Thanks in advance!
Nick says
Hi Christy, as long as you can find some 6″ thick cushions, you will end up around 18″ for the seat height. Ours come out just shy of 18″.
Christy Koenig says
Thank you!! I made the chair and table yesterday and they turned out great! Everything is so sturdy and HEAVY! Thank you so much for the wonderful, detailed plans. Now I’m off to make two couches…. then lots and lots of sanding and staining!
Nick says
I know, they are so heavy! But that’s how you know they’re well made and will stand up over time!
Aaron says
Have you thought about making kid and toddler furniture. How can we modify the chair plans and dimensions for a 3 year old… or 8 year old?
Alicia says
Hi Aaron, We have considered making kid furniture before, we think it would be such a fun idea! However, we don’t currently have any plans to do so. You can always try adjusting the plans accordingly, but make sure you find suitable cushions first. If you give it a go, please let us know how it turns out!
Ahmed says
Hi,
Really nice design and work.
I have a question the back side supports width is 2 inch and the back top and bottom support length is 20.75 inch which means 24.75 in total not 23.75 as mentioned.
Nick says
Hi Ahmed,
In Canada, stores list lumber as the nominal size (the size it was before it has been planed smooth). The actual size is 1.5″ x 3.5″ – which is where you get the 20.75″ length support + 1.5 ” + 1.5″ = 23.75″. Hope this helps!
Joe Adamowicz says
Hello and thank you for a simple, well-designed plan! I made two chairs this past week and they are fabulous.
I did vary only slightly from your plan but some nay find the changes beneficial.
After I cut the word but before assembly, I sanded each pice with 80 grit. This took off the rough stuff and made it easier when finish sanding.
Also, my wife is a short woman (5’0″) and I am taller (6’1″). I make the first chair to your specs and it is perfect for her, allowing her feet to touch the floor when sitting. On the second chair, I increased the leg-post length from 19.5″ to 21″. I also increased the ground clearance from 6.5″to 8″ and it fits me comfortably.
Over the winter, I am making your sofa and coffee table. Thank you for the great ideas!
Nick says
You’re very welcome Joe! Glad you were able to modify it to suit your needs!
Craig says
Hello!
Thanks so much for such an amazing design and build plan! For the pentrating oil, did you use a transparent version, and was that the only type of finish used on this?
Thanks!
Nick says
Hi Craig,
I used the transparent penetrating oil. At the time Home Depot had a Chocolate transparent colour, which is what you see on here, but even a clear penetrating oil would look beautiful on this!
Kaite says
Hi Nick;
I’m curious if you have an idea of what the dimensions of a love seat would be with this set?
Nick says
Hi Kaite,
The width is 78.25″, depth 32″, height about 30″.
Hope this helps!
Estella says
Hey! I made the couch last summer and I am all ready to make these chairs now. Thanks so much for the SUPER clear and easy plans. I could have tried to cobble something together but it wouldn’t have been nearly as nice or sturdy.
We love the couch and it was so easy with your instructions. My husband has experience in this area but I wanted to do it all by myself and I was totally capable. He did chime in when I struggled (we were using scrap wood so there were bowed pieces, etc) but for the most part it was all me.
Can’t wait to have the full set soon. Thanks again!
Alicia says
That is so wonderful to hear, Estella! I am so happy you were able to complete it all on your own, what a great accomplishment!
Ercan says
I shaped the corner set. it was very nice
Paul says
Out of curiosity is the 2 degree angle on the seated portion of the couch just to give it a slightly reclined feel when seated? Thanks for sharing BTW.
Zach says
Where did you buy your cushions?
Nick says
Hi Zach, we purchased these at Home Depot, but any 24×24″ outdoor cushions should work for this. Just make sure they’ve got a little bit of thickness to them (4″ or more probably).
Corey Butler says
Thank y’all so much for the plans. I have a lot of woodworking experience but man, it makes it so much easier to have someone else design projects. Thanks for taking the time and making them available to us.
Nick says
No problem Corey! I’m glad you find our plans helpful…and you’re right sometimes it’s easier to have someone else design!
Dan Welch says
I first saw your furniture plans through rockler where I believe they had much more detail prints, any idea how I can access those plans for a sofa, coffee table and chair. I saved the project but now I can’t see to find it when I finally have the time and money. I pretty sure it’s the same furniture as shown here but like I said I thought the drawings had more details about the assembly, I believe it was posted a couple years ago, any help would greatly be appreciated! PS I love the simplicity but yet a very sturdy furniture
Nick says
Hi Dan,
The Sofa plan is on Kreg tool’s website, and the coffee table and chair plans are both on this site.
Bradford Peters says
I love these and I am planning to build them but I have two questions:
1 – Instead of the screws on top of the arms, can I use pocket hole screws under the arms
2 – I want to us 25 seat cushions, can I just adjust those areas by 1 inch
Thanks for your replay.
Nick says
Hi Brad,
You sure can use pocket holes under the arms! You will be able to see the pocket holes when sitting in the chair unless you fill them with pocket hole plugs. That is the only disadvantage.
As for the 25″ seat cushions, yes you can just add 1″ where applicable!
Mark says
Built the sofa and chairs, was my first furniture build other than a table. Your plans made it so easy to follow. I was stunned how well it turned out. Thank you!!!
Alicia says
This is so great to hear, Mark! I am glad you found the plans easy to follow and we hope you’ll try more of our building plans in the future!
jeff says
Sure wish you would upload the chair and the table to kreg like you did the couch, makes for a much better download that i can use in my shop!
Alicia says
Sorry, Jeff, we don’t have any control over adding additional plans to the Kreg website, but you can find the plans on our site!
Greg Anderson says
Great plans. Thank you. I really enjoyed building the chair and sofa. Would you be able to tell me the width of a loveseat, which would seat two people? That would fill out our patio nicely. Sure appreciate any help you can offer!
Nick says
Hi Greg, you would essentially reduce the width of the center section by about 22-23″ so that you fit one less cushion.
Greg says
Thank you for the plans! Just finished building 2 couches and one chair. Your plans made getting the materials so easy. Only additional step we took was to add a deck board to the arm rest and the top of the back. Thank you for helping us make our back yard come together with this set!!
Alicia says
Thank you, Greg, so great to hear you enjoyed these plans! We hope you enjoy a wonderful summer in your backyard!
Jackie says
Hey there!! I have been working on all the cuts I need to make these chairs but the pictures for the plans are not loading so I am not seeing any diagrams! Help!
Nick says
Hi Jackie,
Have you been able to get the images to show up? I’ve tested it on our side and it seems to be working. Have you also used the Print button at the top of the plans section? It’s a beige and white button.